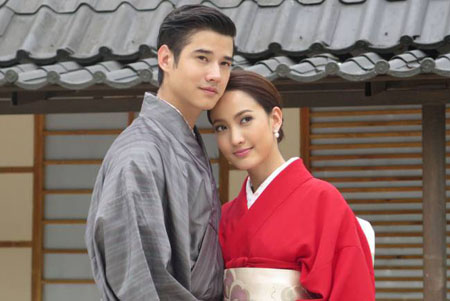
before blur background
 | |
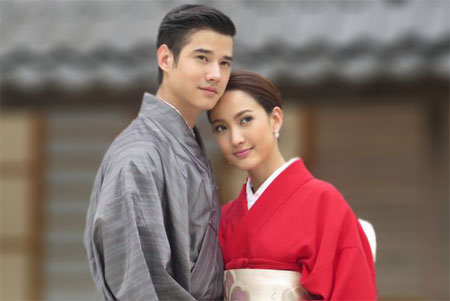
after blur background
 |
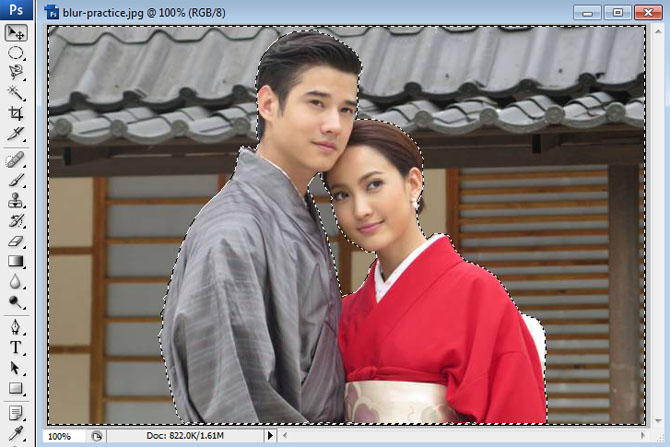
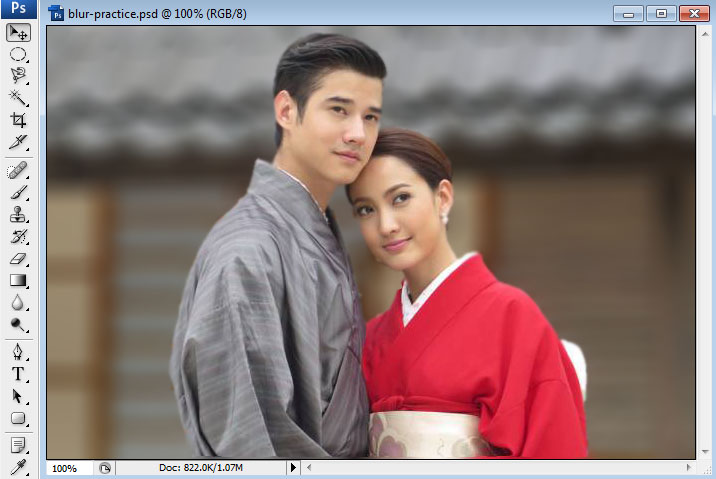
If objects and background are the same color, they are not attractive. The above left picture, both roof and clothes are in gray. The roof makes man in gray not
highlight while red kimono highlight woman.
In real life, when we travel, we choose clothes for many reason such as climate. Background color is not the reason we choose clothes because
we do not know what color background is. We take photo outdoors , not take in a studio. So we cannot control the color of background.
To blur background is a technique to highlight objects in photo. There are 2 tools to blur background.
1) Camera
Not every digital camera or mobile phone can blur the background. To take a photo with blured background need some features that always be in expensive camera
or mobile phone. In the future this feature may be in every digital camera or mobile phone but today it is limited to someone who can pay.
2) Software
We can retouch photo to blur background using graphic software such as photoshop. This article presents how to blur background using Photoshop
Learn English vocabulary by pictures
Pictures are more attractive than alphabets. Matching pictures with words is a technique to memorize vocabulary rapidly.
More than 700 words match with pictures. They are used to play matching games.
The more games you play, the more vocabulary you memorize.
...Click here for more detail...

To memorize and recall vocabulary is a key factor of success for learning foreign language. Keeping your vocabulary in online database and use it to play games.
The more games you play, the more vocabulary you memorize. Vocabulary online supports any language.
...Click here for more detail...
Brain Training

Empower your kid's brain by brain training.
...Click here for more detail...
|
| |
Steps to blur background
Step 1 : Select a picture to blur background
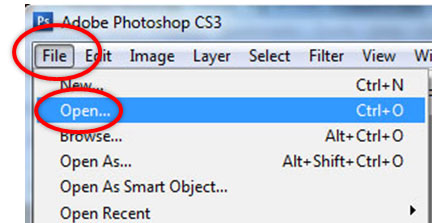 | |
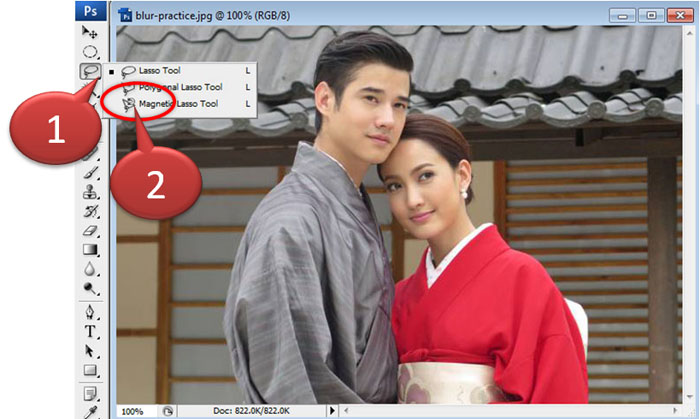
Start Photoshop.
Click File and Open
then select a picture.
|
Step 2 : Select objects to highlight
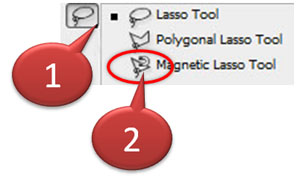
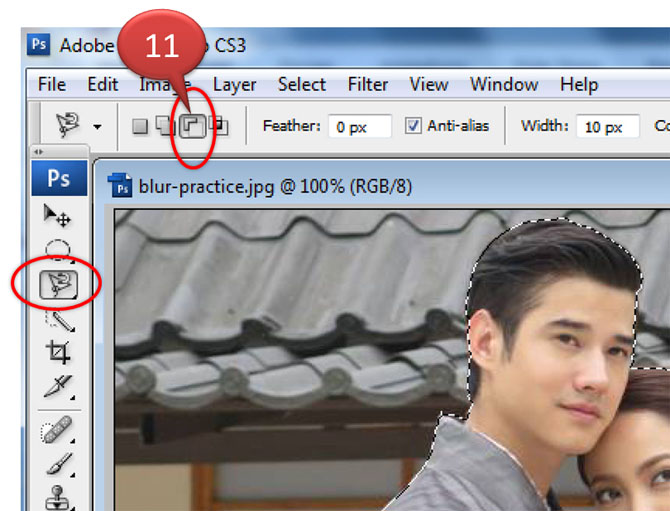
Look for  (lasso) in tools menu (lasso) in tools menu
Click to enter lasso menu (step no 1)
choose Magnetic Lasso Tool  (step no 2) (step no 2)
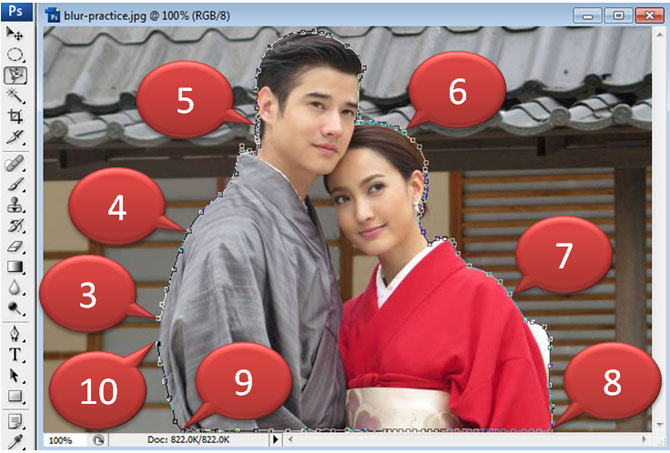
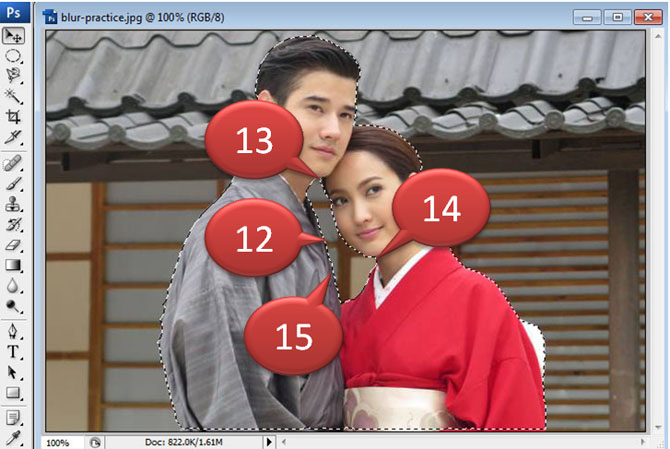
Use Magnetic Lasso Tool to draw a dash line surrround object that you want to highlight.
Click at start point (step no 3) and click along step no 4, 5, 6, 7, 8, 9 and 10 respectively.
Finish point and start point is the same poiint.
More Technique.
Press Delete of keyboard to delete a part of dash line while dragging dash line surround object.
When click step no 10 (near start point)
press Enter of keyboard to drag dash line to start point automatically.
(drag from step no 10 to step no 3 automatically)
When finish point meet start point dash line becomes moving ant.
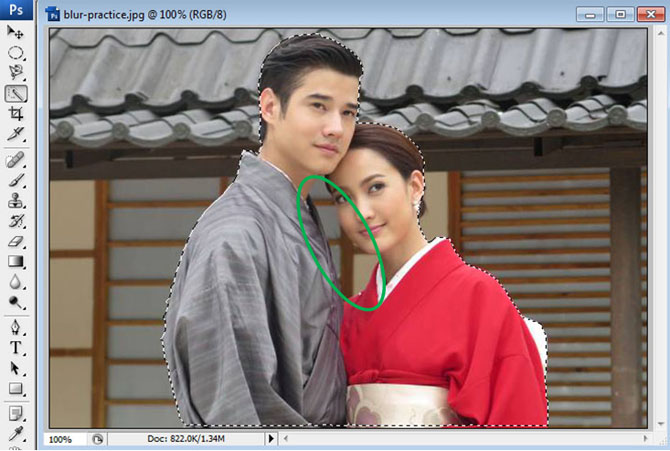
Area in green circle is background. It should be excluded.
Click  (step no 11) to exclude area in green circle. (step no 11) to exclude area in green circle.
Drag a dash line surround excluded area. Start at step no 12
and click along step no 13, 14, 15 respectively.
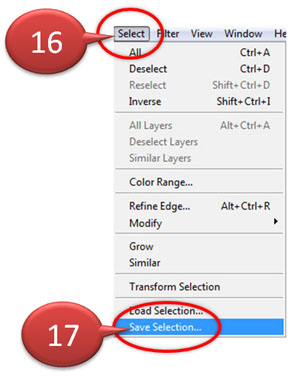
It takes time to drag dash line surround objec. When you finish you should save it.
Click Save (step no 16) and Save Selection (step no 17) respectively.
 | |
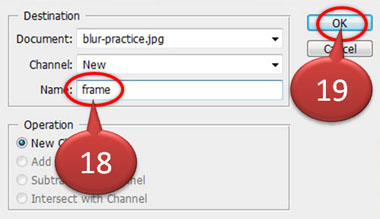
named frame (step no 18)
then click OK (step no 19)
|
To restore dash line, click Select and Load Selection respectively.
Step 3 : Select background
 | |
Click
Select (step no 20)
and Inverse (step no 21)
to swap selected object and background.
|
Step 4 : Blur background
Click Filter (step no 22), Blur (step no 23) and Len Blur (step no 24) respectively.

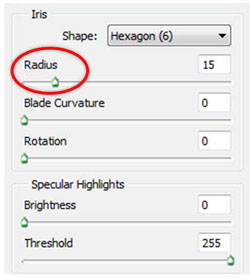 | |
Can define the specification of blur such as
adjust radius to control degree of blur.
|

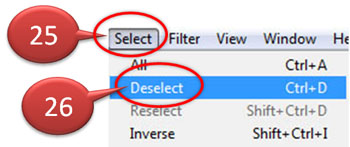 | |
Click Select (step no 25)
and Deselect (step no 26) respectively
to remove dash line.
|
If you want to restore the dash line that saved in 'frame', click
Select and Load Selection then choose 'frame' respectively.
Step 5 : Blur the edge of object
To blur the edge of object makes it look smooth. Click  to access Blur Tool Menu. to access Blur Tool Menu.
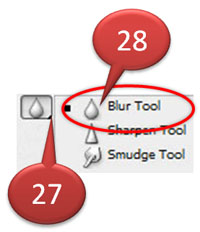 | |
Click (step no 27) to enter menu
and click Blur Tool (step no 28) in menu
|
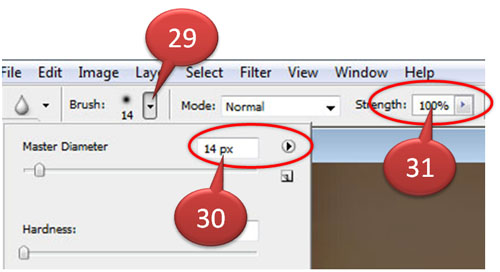 | |
Blur Tool is a circle which can be defined the length of diameter (step no 29 and 30)
and defined what percentage of strength (step no 31)
|
Drag the circle of Blur Tool along the edge of object to make it blur.
You may zoom in to see the object edge clearly.
Click  then select then select  to zoom in. to zoom in.
Click  to zoom out or to zoom out or
press Ctrl+space bar and click the picture to Zoom In
press Alt+space bar and click the picture toZoom Out
|
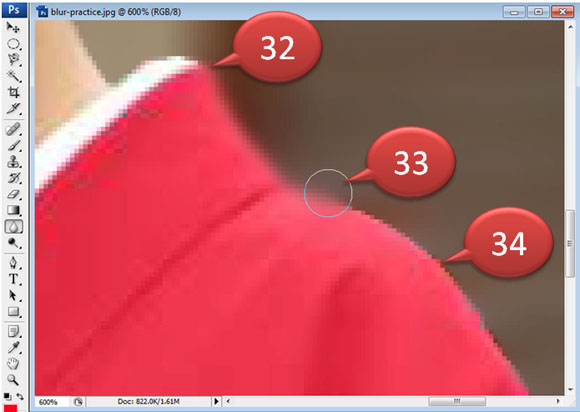 | |
Step no 33 is Blur Tool
Drag blur tool from step no 32 to step no 33
Edge of object from step no 32 to step no 33
is blured.
Edge of object at step no 34 is not blured.
Blured edge looks smooth.
|
Step 6 : Save retouched photo
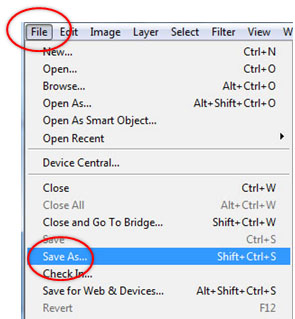 | |
Click File and Save as.
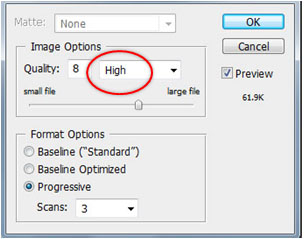
Enter file name and select file type.
File type is JPEG in general.
File name of retouched photo should be different from the original name to make sure that original file is not over written.
Select Quality of High.
|
...Click here to see how to delete objects from photo...
| | Viewer 4,303 | Voter 0 | Average Score |
Copyright (C) 2015-2026 All rights reserved.
|